Organize top level solution folders in .NET
There are different ways to create Multi-Project Solution or Single Project solution from scratch, for example using the .NET command-line interface (CLI) or the Visual Studio (VS) GUI, let’s analyze them. As an example, let’s create a solution divided into four projects having a well-defined structure, splitted with two top level solution folders: a src folder (we’ll put here source code, business logic, abstractions, entities, exceptions) and a tests folder, where we’ll place the unit tests for each project.
Via .NET CLI
CLI provides many commands that are installed by default and perform an action, in our case we will use just a couple of them. These commands quickly scaffold code for our projects.
As a first step we use the dotnet new command which creates a .NET project or other artifacts based on a specific model. In our case it is necessary to create an empty solution by passing it the argument sln as show below:
dotnet new sln -n NameOfMySolution.CliThe next step is to create the src folder and add our projects. To do this we use the command dotnet new classlib -o, it sets up a class library and the -o option is useful for our purpose to point the output directory.
dotnet new classlib -o src/StructuredApp.Cli.Domain
dotnet new classlib -o src/StructuredApp.Cli.Infrastructure
dotnet new classlib -o src/StructuredApp.Cli.Application
dotnet new console -o src/StructuredApp.Cli.Console
Let’s do the same with the tests folder, this time we use the command dotnet new mstest to create a unit test project:
dotnet new mstest -o tests/StructuredApp.Cli.Domain.UnitTests
dotnet new mstest -o tests/StructuredApp.Cli.Infrastructure.UnitTests
dotnet new mstest -o tests/StructuredApp.Cli.Application.UnitTests
dotnet new mstest -o tests/StructuredApp.Cli.Console.UnitTests
It’s not finished yet, the last step is to add the projects to the solution (we can add multiple projects to the solution in a single command by separating them with a space).
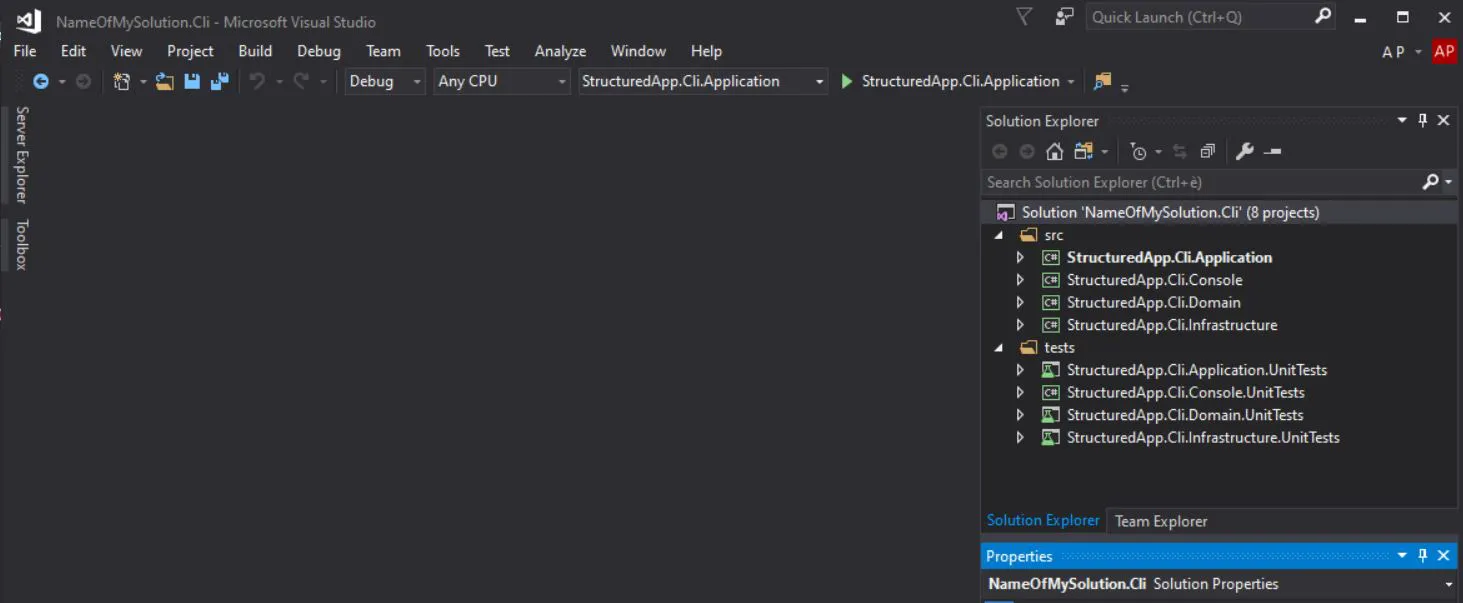
dotnet sln add .\src\StructuredApp.Cli.Application .\src\StructuredApp.Cli.Domain .\src\StructuredApp.Cli.Infrastructure .\src\StructuredApp.Cli.Console .\tests\StructuredApp.Cli.Application.UnitTests .\tests\StructuredApp.Cli.Domain.UnitTests .\tests\StructuredApp.Cli.Infrastructure.UnitTests .\tests\StructuredApp.Cli.Console.UnitTestsand below is the screenshot of the final output seen from VS:

Via VS GUI
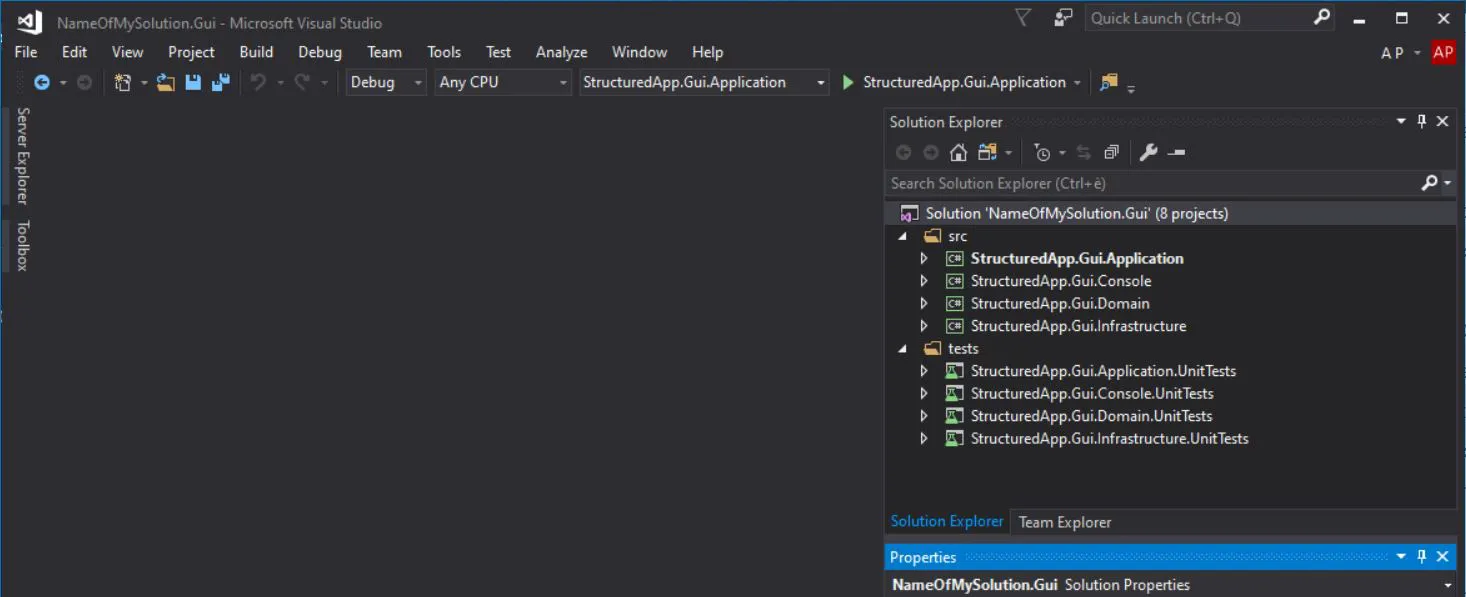
In this case I am not aware of a standard and clean method like the previous one, the solution is a bit dirty but achieves the final goal. As first thing, create an empty solution, on the menu bar, select File > New > Project. In the templates panel, select Other Project Types > VS Solutions in the expanded list. In the middle panel, select Blank Solution. Now this is how it looks like:

The second step is to set a new Solution folder named src by right clicking on the Solution > Add > New Solution Folder. This will create logical folder, not physical. Right click to the src solution folder and open a new project dialog, add one of the projects, for example StructuredApp.Gui.Application but before saving, you have to change the project location, create the real directory src inside your solution folder on the file system. At this point VS will put the project inside it. However the two “src” folders are not the same but in this way the structure of your solution view will follow the structure on the disk.
Repeat this configuration for the remaining projects StructuredApp.Gui.Domain, StructuredApp.Gui.Infrastructure and StructuredApp.Gui.Console. Apply now the same method also for the tests folder, let’s create a physical directory and include StructuredApp.Gui.Application.UnitTests, StructuredApp.Gui.Domain.UnitTests, StructuredApp.Gui.Infrastructure.UnitTests and StructuredApp.Gui.Console.UnitTests. This is the final result you get:

Conclusion
I find that breaking down the solution properly is important and in my opinion they are both acceptable answers. Overall .NET CLI is a powerful tool and I think it breaks the .NET developer’s dependence on Visual Studio IDE. If you’re curious as a developer, you probably are not in favor of being tied to one development tool, and the CLI gives you a sense of what’s usually going on under the hood.
Bye, Alberto
Related Posts

Exception Filters in .NET Framework: Goodbye to Try-Catch Hell
Exception handling in .NET Framework 4.8 using custom Exception Filters

Using Value Tuple
All of us write methods that return one value, string method return a string, int method return an int, but what do you do when you need to return more than one value?

Dictionary instead of switch or if statements v2
In the previous article I talked about how, in my opinion, is possible to improve the code quality by storing keys/values in a dictionary instead of using switch or conditional statements.